How to Continue Knit a Socks After Turning the Heel
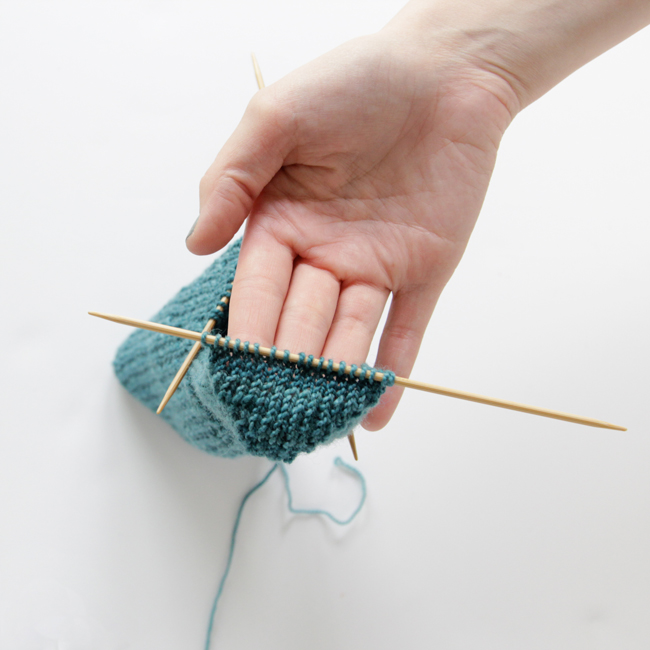
I'm having such a nerdy blast hosting my first knit along. I hope you guys are having as much fun as I am! It's interesting how much you reinforce your understanding of something when you're actually explaining to another person (or people) how to do it. Knowledge is power! Even knitting knowledge. ;)
Brace yourself! Big foot sighting ahead…
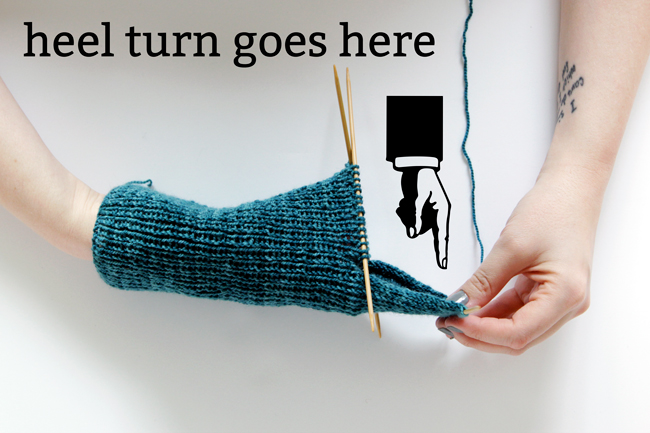
So before you turn the heel, this is what you're working with – a ribbed leg that's several inches long, and a 2.5-3 inch heel flap. Now all of a sudden, since humans' feet are perpendicular to their legs, you've got to start knitting in a totally different direction than you have been! Plus, half your sock is chilling up on the top of your foot, and the other half is down at the base of your heel. First time knitters, you're probably thinking this is pretty weird about now, amirite?
Oh, and here's the visual of how your in-progress sock is looking, since I do think it helps to see the sock come together on an actual foot.
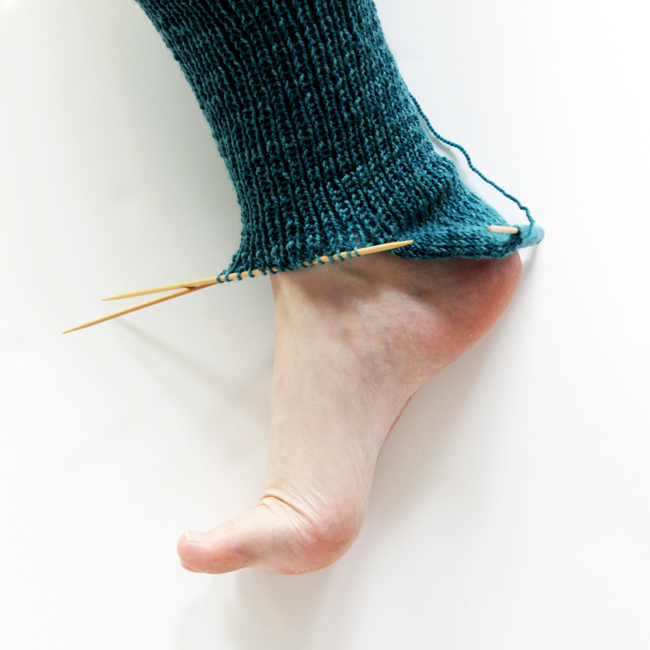
Please forgive my pale, pale, vein-visible foot. And short toes. Can you tell I feel super awkward about showing my foot (instead of thirteen bazillion shots of my hands, lol) on the internet?
During the heel turn, the needles holding half of your socks' stitches that hung out during knitting the heel flap will continue to hang out. You're just going to be knitting off of the heel flap.
The day 3 pattern
Reminder: for all of the pattern sections of my Knit Along posts, I'll include all of the previous days' sections of the pattern for your reference.
Abbreviations
sl – slip
st – stitch
k – knit
p – purl
CO – cast on
RS – right side
WS – wrong side
k2tog – knit 2 sts together
ssk- sl 1 st as if to k, sl 1 st as if to p, k2tog
p2tog – purl 2 sts together
turn – turn your work over and work on the other side (even if you aren't at the end of a row/round!)
CO 64 sts, join into a circle with DPNs and begin working a knit 1, purl 1 rib stitch all the way around. Continue working in k1 p1 until your sock is 7 inches from the cast on edge, or as long as you want the ankle to be on your leg.
Heel Flap
Divide half of your stitches* onto 1 needle (or 2 if you like my method of starting on more to avoid stretching). Leave the other stitches on 1-2 needles, untouched.row 1. (WS) {sl 1, p1} across
row 2.{sl 1 as if to p, k1} across*If you're working with 64 stitches, that means you'll be working 32 sts.
Turn Heel
row 1.sl 1, k 16**, ssk, k1, turn
row 2. sl 1, p3, p2tog, p1, turn
row 3.sl 1, k4, ssk, k1, turn
row 4.sl 1, p5, p2tog, p1, turn
row 5.sl 1, k6, ssk, k1, turn
row 6.sl 1, p7, p2tog, p1, turn
row 7.sl 1, k8, ssk, k1, turn
row 8.sl 1, p9, p2tog, p1, turn
row 9. sl 1, k 10, ssk, k1, turn
row 10.sl 1, p 11, p2tog, p1, turn
row 11.sl 1, k 12, ssk, k1, turn
row 12.sl 1, p 13, p2tog, p1, turn
row 13.sl 1, k 14, ssk, k1, turn
row 14.sl 1, p15, p2tog, p1, turnFor a heel turn starting with 16 sts, the heel turn is complete. There should be 18 sts on the needle now. If you're working with more or less sts, your heel needle will have 2 more sts than you began the turn with.
**or whatever number is half of the stitches in your heel flap, a.k.a. 25% of the total number of stitches CO
Tips & Tricks for Turning the Heel
Since I truly believe it's basically impossible to understand how to turn a sock heel for the first time based on a knitting pattern, here's a step-by-step photo breakdown of what the heck is going on.
First up, you're working on the right side of your work, and you'll do a simple slip of one stitch as if to purl.
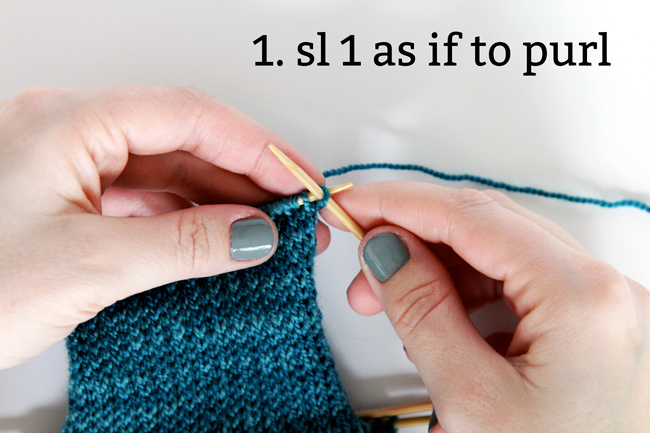
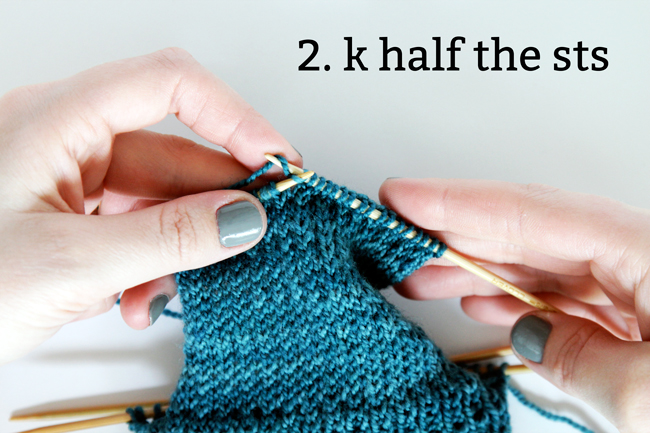
Next, knit half of the stitches on your heel flap needle. In my case, that's 16 stitches.
The SSK / slip slip knit
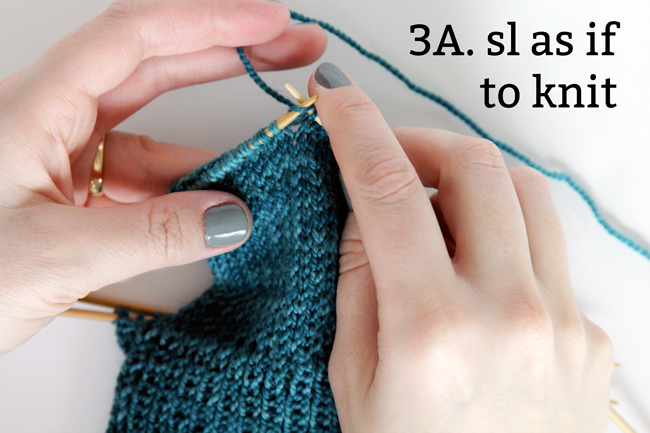
For those of you who have never done a ssk before, here's how to do that.
A. Slip the first stitch as if to knit.
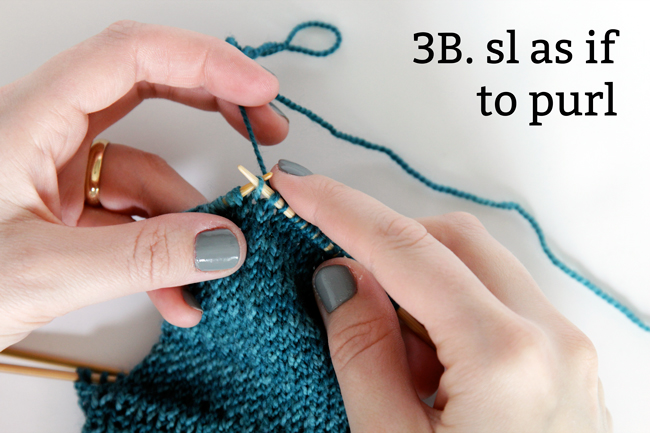
B. Slip the next stitch as if to purl.
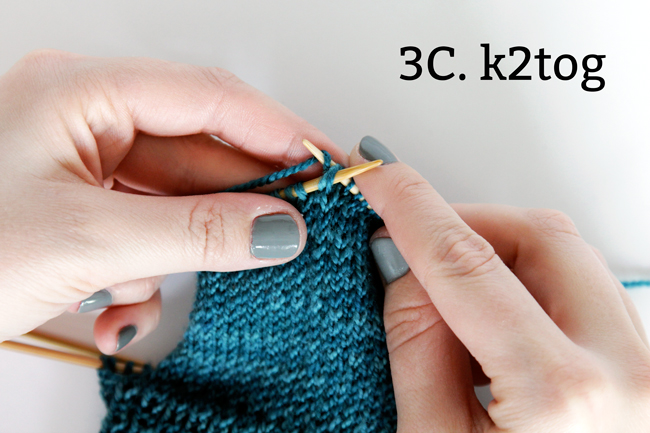
C. Pass the 2 slipped stitches back on to the left needle. Then knit those 2 stitches together, as shown, as if they were a single stitch.
Knit one stitch after the ssk.
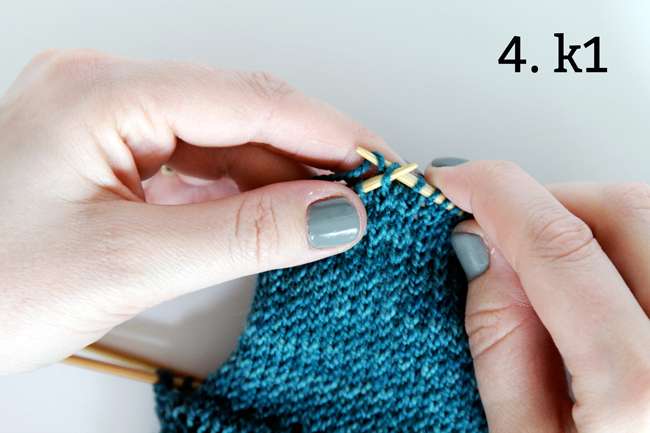
Wait, we're turning the work before I'm even done with this row?
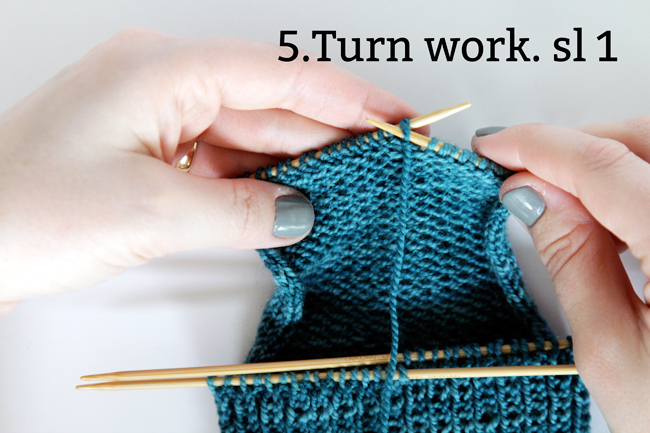
Yep! This is called working in short rows. Now you're on the purl/wrong side of your work. Slip the first stitch.
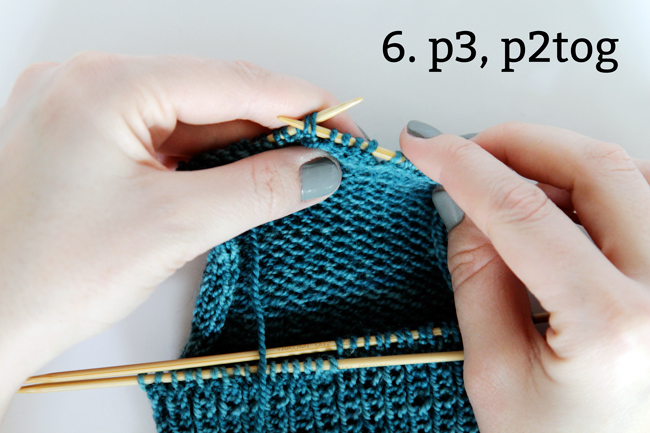
Purl 3 stitches, then purl 2 stitches together by putting your right needle through 2 stitches at once and purling them at the same time.
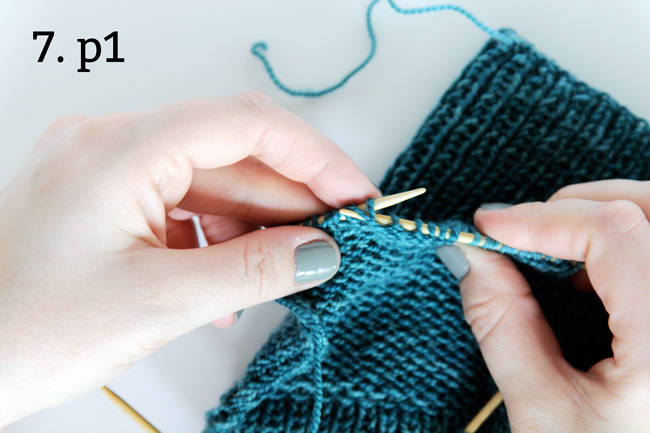
Purl one more after the p2tog.
Turn your work back to the right side (yes, already!), and slip one stitch as if to purl, knit 4, ssk, and knit one.
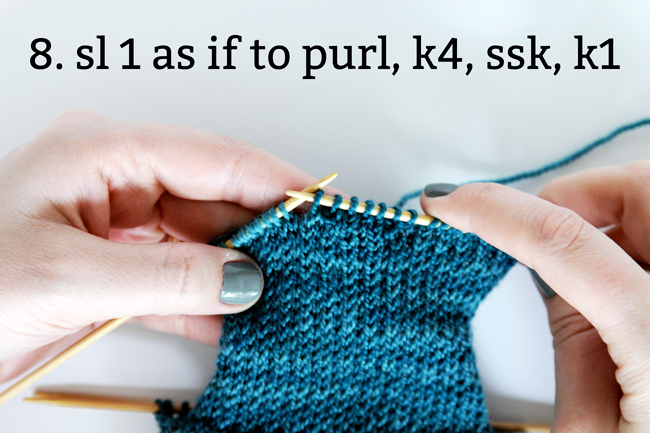
Sensing a pattern? Every row involves working just one more stitch across before the ssk or p2tog. You repeat the pattern until you've run out of stitches, and your sock is looking like this.

If you do well with videos, I recommend this video that I found helpful when I first knitted a heel turn. I love the video because the teacher is likethe most excited about heel turns. It's infectious! ;)
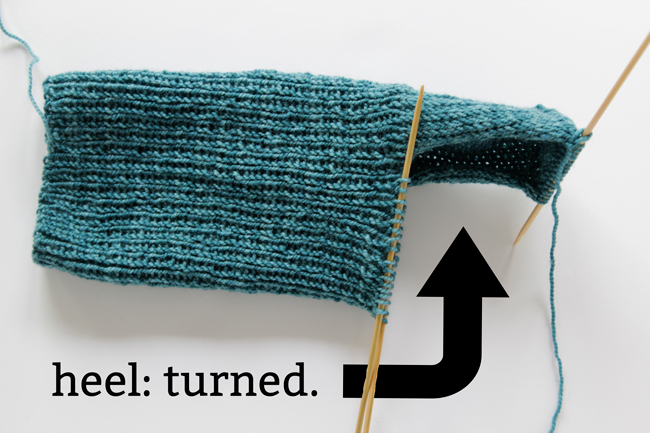
–
Other posts in this knit along series
KAL announcement / KAL Day 1: Testing Gauge & Casting On / KAL Day 2: Heel Flap / more coming soon!
The next Knit Along day isTuesday, May 6– it'll be a knitting anda vocabulary lesson since we'll be working on the GUSSET of the sock. I've always thought a gusset sounds like something out of a Victorian tale, but it's not. More on that later!
If you get stuck on this week's or any of the previous knit along steps, please don't hesitate at all to holler in the comments, I'm more than happy to help! As always, you can tag pics or tweets with #handsoccupiedkal, you can embed the KAL badge with the code below, or join our Hands Occupied Knit Along Ravelry Group to connect with other folks making socks. Happy heel turning!
<a href="https://www.handsoccupied.com/knitalong"><img src="https://www.handsoccupied.com/wp-content/uploads/2014/04/april2014kal.jpg"></a>
Source: https://www.handsoccupied.com/knit-along-day-3-heel-turn/
0 Response to "How to Continue Knit a Socks After Turning the Heel"
Post a Comment