How to Draw the Iconic & Beautiful Golden Gate Bridge in 7 Steps
Source : https://artprojectsforkids.org/how-to-draw-the-golden-gate-bridge/
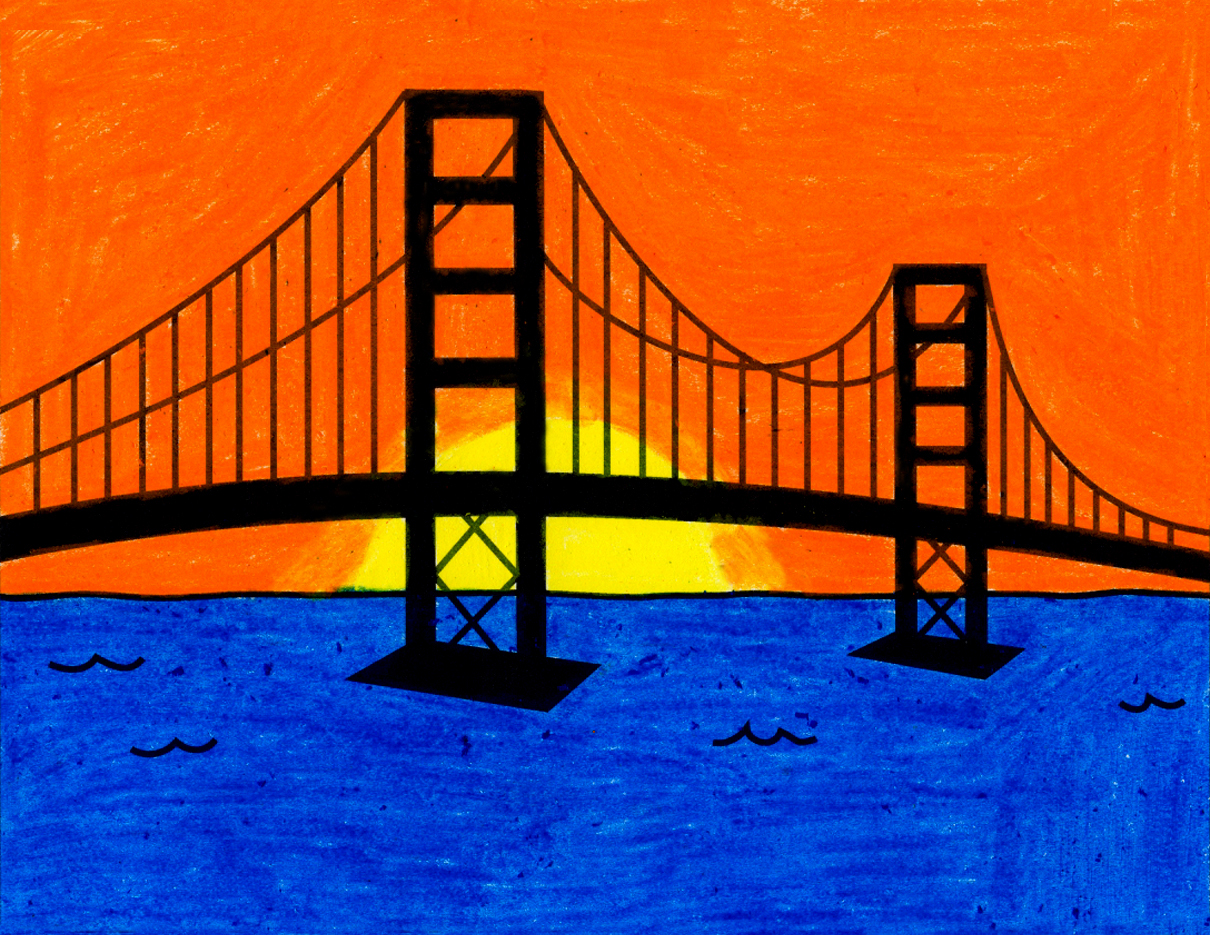
The Golden Gate Bridge is iconic and cute, and many people desire to know how to draw information technology, but it certainly isn't an easy thing to draw well. The different supports and mix of curves and straight lines brand information technology a challenging sketch for most people.
You Volition Need:
- Some apparently paper
- A sharp pencil
- A pencil sharpener
- An eraser
- A ruler
- A fineliner
Step 1: Divide Your Paper Into 4
First, let'southward add some faint guides. Using your ruler, find the heart of the paper and pencil in both a horizontal and a vertical line. You tin can too fold the paper in one-half both ways and lightly pucker, only this volition affect the final picture a bit. Having a segmentation will help y'all to draw direct, even lines.
Pace 2: Depict The Arch
Going right across the sheet of paper, draw a gentle arch, but below your horizontal guide.
Next, draw another one almost parallel. Your second one should narrow merely a little at the right-hand side to let for perspective, and be slightly wider on the left-mitt side. If possible, it should too affect the central guide at its highest point.
This is the lesser of the bridge.
Step 3: Depict Two Supports
Using your ruler, describe two thin, vertical, rectangular supports merely left of your key guide. Make one back up just slightly higher than the other to give a sense of perspective. These supports should be drawn standing on an angled rectangle, in the bottom left foursquare of your newspaper. They will bifurcate your arch.
Once you're happy with that, information technology'southward time to add the details of the supports. Start at the peak and draw a line betwixt the two supports, followed by another line. This is the pinnacle strut of the support.
You are going to draw 4 of these in total. To get the spacing right, draw the bottom one adjacent; this should get a piffling above the arch. Draw two horizontal lines, a short distance apart, as you lot did for the top back up.
Next, fill in the final two supports in the space between the acme and the bottom one. Y'all may need to erase in places to try and become them even; there should be approximately the aforementioned gap betwixt each support, and between the bottom support and the arch of the bridge. It doesn't need to exist perfect, though!
Move onto the crosses at the lesser of the bridge. You are going to describe 2 "10" shapes betwixt the rectangle at the base of your supports and the top line of your arches.
Mark the halfway point and and so draw an "X" in each half.
Step 4: Draw The Second Supports
Nigh halfway across your right-hand squares, you are at present going to echo the above instructions, simply about a tertiary smaller. You desire the base of your secondary supports to be a trivial higher than your first ones, just the top should cease a skillful chip lower.
Otherwise, the supports should exist identical, so apply the same process for drawing them; the merely change is that everything should exist smaller to allow for perspective.
Step five: Describe In The Cable Lines
Put your pencil to the left edge of the paper, a little above your horizontal halfway line. Draw a gentle curve upward to the top of the right-hand back up.
Depict the second cable a piddling to a higher place this one, at approximately the same trajectory. Information technology does not need to friction match and may look improve if y'all draw it slightly straighter.
Now it's fourth dimension to join the first support to the second i. Start on the right-mitt support; yous're going to join information technology to the next right-manus back up.
Draw a curving line that dips down to about the tertiary horizontal bar on the second support, then sweeps dorsum up to meet its top. You should aim to take the lowest point virtually ii-thirds of the manner forth the line.
This will requite y'all a long downward, about directly line from the first support, and a steep curve sweeping up to meet the 2d support.
Next, turn to the left-hand supports. You can either draw from the top of the first left-manus support, or between its 2 central horizontal struts; it volition but look similar the line is hidden behind the rest of the supports.
Draw a shallower and more than even curve to the 2nd left-hand support. This should cross the other cablevision, enhancing the perspective.
Finally, draw a sloping curve from the smaller right-paw support to the edge of the paper, dipping downwardly lower than either of your other four cables.
Stride half dozen: Draw Vertical Lines
Use your ruler to marking and draw evenly-spaced vertical lines between the arch and the highest cablevision right along the bridge. Do not draw them in front of your supports, merely otherwise go on all the fashion along with the motion picture, representing the ropes that go from the cables to the bridge.
It doesn't matter if the lines seem to join upward to unlike cables; this volition enhance the perspective. Don't try to depict vertical lines for both cables, as this will wait messy.
Step vii: Erase, Particular, And Fineline
Erase whatever lines you are unhappy with, including your guidelines; you've finished with those. Add a water line and some waves a little above the structural supports; this should run straight across your paper and non conform to the perspective lines. Depict freehand and then you get a natural waviness to information technology.
Add a few little waves or other details, so Fineline your picture to finish it.
Conclusion
Your Gold Gate Span is at present finished! If yous've used a ruler, yous should accept a adept mix of directly lines and smooth curves to reflect the bridge's iconic shape. If there's anything y'all're uncertain about, try bringing upwardly a moving picture of the bridge to help you lot depict more than accurately and empathise the shapes.
You can describe a simpler version of this picture without the perspective, but adding a flake of depth volition make it look better and is a good opportunity to practice the challenges that perspective presents. Your Golden Gate Bridge drawing is consummate!
Source: https://craftwhack.com/how-to-draw-golden-gate-bridge/
0 Response to "How to Draw the Iconic & Beautiful Golden Gate Bridge in 7 Steps"
Post a Comment